30 November 2015

Front Control Arm Service


Replaced the control arms tonight.  I used the puller tools from Moosa at MIS here and here.  The MIS tools aren't beautifully finished by any means but they work.  The second tool that removes and installs the actual bushings is very tricky to use.  Probably best to have a local garage (or a press, if you have one) do that work instead of using his tool.  You can get new bushings from Lemforder, but unlike other models the only control arms themselves I could find are original BMW parts.  I did watch this video and this one for tips on how to do this work.

Control Arm Wishbone, left, 31122228461, $226.08r
Control Arm Wishbone, right, 31122228462, $226.08r
BMW Control Arm Bushing Kit Front (E36 M3 Z3) - Lemforder 31129069035, $31.99r (set of 2) from FCP Euro
Self locking nut, 31106774714, need 2, $2.00r each
Washer, 31111114348, need 4, $1.84r each
Bolt, 31111137888, need 4, $5.34r each
Self locking nut, 32216769539, need 2, $1.77r each

Total price of this mod = $520.41r

Total investment in vehicle to date = $4,264.19

Access to the top nut on the driver's side is quite poor.  Passenger is much easier.
Control Arm Removal Tools
MIS Puller Tool
MIS Puller Tool
Old bushing on left, note the "98" marking.  New bushing on right, note the "15" marking
Pulling the bushing out of the lollipop
Pulling the newly-loaded lollipop back onto the control arm

All new hardware
New arm installed
New arm installed
New arm installed

23 November 2015

License Plate Trim

Trimmed the edge of my license plate today.  I don't use plastic or metal plate trim rings.  Instead, years ago, I followed a post by S54 roaster owner Daniel McRobb.  "dwm" used sheet metal edge trim from McMaster Carr to finish out his plate.  It looks fantastic and it is functional.  To install, I used contact cement on the back of the plate only.  Many other glues would probably work too.  I bought a 25 foot piece because I had more than one plate to do.  You can use much less if you are only doing one or two plates.

McMaster Carr Rubber Edge Trim 8507K61, 25 feet, $18.00r


Some S54 love 
Rare Original BMW Motorsport Banner shown


19 November 2015

TBT: S54 Press Release Photos

Found these stored on my home computer.  The pic of the S54 installed in the car... any guess as to the color?  My guess is Velvet Blue Individual.


18 November 2015

Giubo Service and Transmission Mounts

Found a crack in the giubo inspecting the car.  When you find a crack do not wait to replace this part.  It is easy to inspect and there are no excuses for not checking it at oil changes.  If you are replacing a giubo you might as well replace the transmission mounts as well.  I had a long hard look at the driveshaft center bearing support, but decided to "leave it be" for now.  That said, I am so used to replacing every part I can with new, I am second guessing that choice now.

Cracked giubo was replaced.
This car has been apart before.  I did notice the driveshaft center bearing support was NOT preloaded when I took the car apart.  Zero.  I reassembled with it preloaded, 4mm towards the front of the car.  Also, the locking ring for the front part of the driveshaft was not torqued, at all.  Correct torque for it is 10 Nm.

Part number 7/8 was loose.
Correct torque for this is 10 Nm.

During this work I removed the heat shields between the exhaust and the driveshaft.  Found a nice collection of dead spiders, spider nests, insects, grit, and gravel.  All cleaned.  Did my best to clean the heat shields but some cosmoline remains.

Self locking nut 07129900047, qty 6, $1.20r each
4 each Nut 26111227843, qty 4, $9.15r each
1 each giubo  26112226527, qty 1, $177.64r
1 each Sleeve 26117526611, qty 1, 7.77r
6 each Bolt  26117635643, qty 6, $4.66r each
1 set Rogue Engineering Transmission Mounts, $55.00r

Total cost of this mod = $312.17r
Total investment in vehicle to date = $3743.78

Note BMW wants you to turn the nuts, not the bolts!  This is nearly impossible for some of the 6 connections.  If you do turn a bolt, turn bolts up against the flange.
Cleaned heat shields, except for some cosmoline.


17 November 2015

Shifter Service

The E36 shifter gets sloppy with age.  This is due to loose fitting bushings and also high heat in the transmission tunnel.  And just plain-old wear.  Some performance can be improved with delrin bushings.  I replaced every part in the assembly.  I had the driveshaft and the giubo out anyway so this mod was made easier.  You might as well do this work if you are doing the giubo. I followed the instructions here and here and they worked pretty well.  Although I didn't take a picture of the condition of the car as I found it, I swear the selector rod was mounted on the driver's side of the driveshaft tunnel when I got there.  That is incorrect.  The stock selector rod should be mounted on the passenger's side of the driveshaft tunnel and the small bend should be in the front.  I used Superlube grease on all connections that move.

Note that the new shifters and the new bearing (-281 part number) do not need the old yellow washers any more.  They have integrated flanges which make the old ones unnecessary.

4 yellow washers not required with the newest shift levers and shifter bearings.

Correct orientation of shifter selector rod: on passenger side of the driveshaft tunnel, with the bend at the front.


Transmission seal, 23121222677, need 1, $18.35r
Pin, 23411466134, need 1, $1.45r
Shifter cup, 25111220600, need 1, $14.85r
Rubber Boot, 25111221700, need 1, $36.35r
Carrier, 25111222015, need 1, $25.17r
Shifter, 25117527254, need 1, $104.83r
Bearing, 25117580281, need 1, $21.79r
Shifter Clip, 25117571899, need 2, $1.18r
Carrier bushings, ECS Tuning, $39.95r

Total cost of this mod = $265.10r
Total investment in vehicle to date = $3431.61

13 November 2015

Refreshments

When I washed the car, I noticed water pooling in the fuel filler neck seal behind the gas door.  Turns out the drain was clogged.  I fixed it with a careful cleaning and then snaked a 22 AWG stiff wire down the length of the drain tube.  All clear now.  The locking drain cap is original to the car and keyed to the ignition, but it is missing the original lanyard to tie it to the fuel door.  So that's a part to work on for later.

Fishing a stiff wire down the drain will clear out any debris.
Also noticed in the parts catalog you can buy replacement clear paint film rounds.  Cool.  In another post I had to make my own.  These replacements are larger than the original ones.  Maybe they will stay in place better.  I like them more than the stock ones and will probably replace all of the ones on my Imola S54, too.  You need 6 total.


New paint film in place, you can see under it where the car had run for years (?) without it.  These easily come off the original cars and most don't have it.  Excuse the uncleanliness.

Clear film rounds, 51711922189, $2.12r each, need 6 to do the whole car

Total price of this refreshment = $12.72r

11 November 2015

Tie Rods

Replaced the tie rods with new Lemforder branded ones.  Not a hard job if you have the right tools.  As usual, I bought the Lemforder parts at FCP Euro.  I did watch this video and also the second part, they are really clear on how to do this work.  I used 42 Nm for the torque on the outer tie rod.

Tools
Cal-Van Tools 946 Low Profile Inner Tie Rod Tool,  $16.67 at Amazon, I ended up using a 32mm thin wrench instead
Great Neck OEM 27175 Damage Free Tie Rod End Remover, $38.68 at Amazon


Left tie rod, need 1 BMW part number 32111139315, $44.99r for Lemforder
Right tie rod, need 1 BMW part number 32111139316, $44.99r for Lemforder
Lock plates, need 2 BMW part number 32111140464, $5.52r each
Steering rack boots, need 2 BMW part number 32211139786, $7.99r for Lemforder
Self locking nut, need 2 BMW part number 32216756327, included with tie rods from Lemforder
Tension strap, need 2 BMW part number 32111137132, included with boots from Lemforder
Tension strap, need 2 BMW part number 32131094100, included with boots from Lemforder

Total cost of this mod = $117.00r
Total investment in vehicle to date = $3166.51


These are the BMW lockplates.  Once installed you have to hammer the thin edge down onto the hex end of the tie rod to prevent it from backing out at all.

I did not use the inner tie rod tool shown at the bottom.  Instead, I was able to get a 32mm open end thin wrench onto the inner tie rod ends.

Here is the tie rod end remover in place, ready to remove the outer tie rod

Tie rod end remover in place

32 mm open end thin wrench can remove the inner rod

Lowest tie rod is the OEM left.  New above it is the new Lemforder left tie rod.  They look identical to me.

Locking plate in the locked position.

Nice clean tie rod installed on right hand side.  Excuse the dirt, have not cleaned the underbody yet.


06 November 2015

Wheels and Tires

The tires that came with the car had some life left in them, but the rears were dangerously close to the wear bars and all 4 were 2008 vintage.  The wheels didn't have any severe curb rash, but there were many scrapes and dings and attempts at repair.  Even though this is an S52, all 4 wheels that came with the car were S54 Chrome Shadow models.  I have heard the same as you, that Prince Wheels in North Carolina is the place to get Chrome Shadow wheels refinished.  Supposedly no one else can come close.  I had had good luck with the local place, Jett Wheels in Charleston.  Hugh Jett is the owner.  Jett did our MZ4 wheels and he did the gloss black on my E90 M3 Style 220M 19" forged wheels.  All with great service.  He is a Tire Rack installer, so you can get the whole job done in one stop.  He did a very very nice job on these.  The barrels are black.  The finish is not quite OEM when you compare them to my S54 wheels, but it is still fantastic and these will look great on the silver car.

Michelin Pilot Super Sports, Tire Rack, $667.84r shipped
Refinished Chrome Shadow Roadstars, $207.00r each
Dispose of old tire, mount balance, new valve stems, $20.00r each

Total cost of this mod = $1575.84r
Total investment to date in vehicle = $3049.51


Wheel on the left is refinished, wheel on the right is Original BMW

Routine Maintenance and Fluids


I completed a bunch of standard maintenance items on the car.  With this car, I elected to buy some parts and filters that are original equipment manufacturer, but not necessarily in BMW boxes with BMW part numbers.  There is money to be saved this way.

The power steering reservoir comes with a new cap that says "CHF 11..." on it.  That is the new power steering fluid BMW uses and is not right for the M coupe.  M coupe should have ATF.  BMW does sell a little green label that says "ATF" (part 71246798132) that is supposed to go onto the cap to cover up the printed "CHF 11...", but it is $15.84r.  Even I think that is nuts.  I know there is ATF in there, I know to use ATF, so I am leaving the $15 sticker off.  Incidentally, the single 10mm bolt that holds the P/S reservoir to the car is a real whore to put back in place.  The bolt is very short and it's hard to line up with the welded nut on the other side.  The fix here is to totally remove the P/S reservoir bracket from the left side motor mount.  Two 13mm bolts for this.  Once completely free from the car, the P/S reservoir bracket will get a little more flexible and you can get the 10mm bolt started.  I spent a stupid amount of time fiddling with the 10mm bolt before I figured this out.  Incidentally, the way to bleed the P/S system is start the car and turn the wheel lock to lock several times.  I removed and replaced the lower power steering hose in order to drain the maximum amount of fluid from the system.

In the process of replacing the transmission fluid I found a crack in the giubo/driveshaft flex disk so I will be replacing that in a future post. 

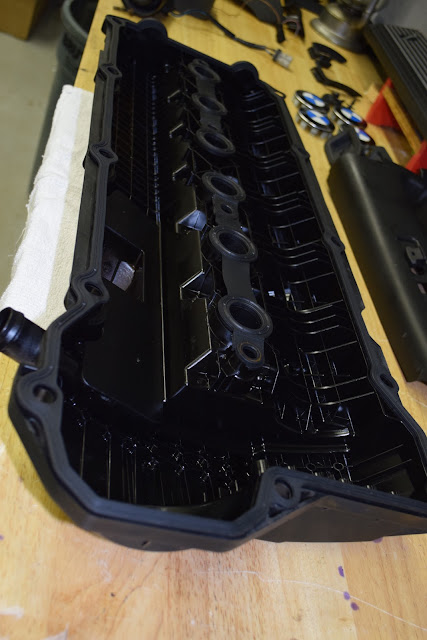
The valve cover wasn't leaking any where and you can change spark plugs without disturbing the gasket, but I wanted to look inside the engine anyway.  Very nice color and very good indications of a healthy, well-cared-for engine.  So that was good news.  Plus, new gaskets are fun.

I am planning to replace the radiator in this car with an S54 radiator and add an S54 oil cooler at the same time.  But, I am not sure when that will be.  So I am changing the coolant now just because I have the car on jackstands.  ~$20 for coolant is a cheap might-as-well.  I replaced the coolant drain plug with a LeatherZ / VDO drain plug so my to-be water temperature gauge can read the temperature there.  More on additional gauges later.

Diff Oil, Castrol SAF-XJ, in stock bought on ebay years ago, $0.00

Diff Plug with integrated o-ring, 33117525064, $6.17r each, need 2

BMW OEM LT-2 Trans Oil, $151.73r for 5-liter jug (enough for 3 oil changes)

Fuel Filter, Mahle, FCP Euro, $20.99r

Air Filter, Hengst, FCP Euro, $11.99r

Spark Plugs, Bosch, FCP Euro, $7.99r each, need 6

Valve Cover Gasket, 11120034108, $50.67r  

Oil Filler hole gasket, 11127526447, $7.25r

Rubber seal, valve cover, 11121437395, $1.16r each, need 15

BMW Drei Bond for valve cover gasket, 07589062376, $19.01r

Power Steering Reservoir with integrated filter, 32416851217, $60.63r
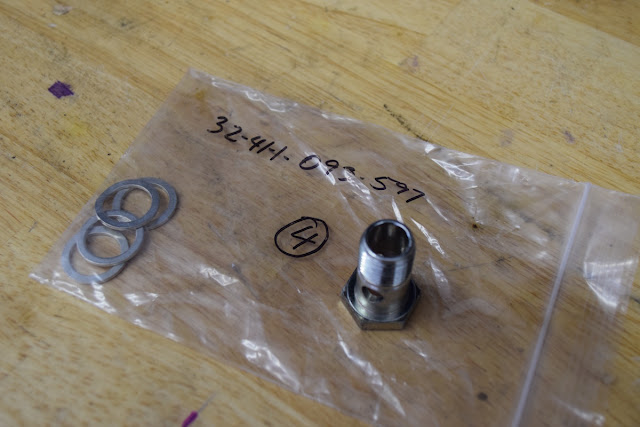
Power Steering Crush Washers, need 2, 32411093597

Power Steering Fluid, Redline A4 DTF, 2 liters

BMW Coolant, 82141467704, $24.95r

1 gallon distilled water from grocery store, $1.00r

Brake and Clutch Fluid, ATE Typ 200, 2 liters, $17.00 each


Total price of this mod = $358.75r (prorated LT-2)

Total investment in vehicle to date = $1473.67r


In a pinch, you can get the proper SAF-XJ for the differential from Mercedes dealers.
Used brake fluid.  Not a good color!

I was very happy with the colors and wear indications inside.  Testament to the previous owners and/or Amsoil.

You can see a tiny bit of wear on the round parts of the cam lobes.  This is not there on the S54 engine.  Do all hydraulic lifters do this?

New gaskets

Add Drei Bond at joints

Add Drei Bond at joints
Lower power steering fluid hose disconnected for draining.  Replace crush washers.
New power steering hose crush washers
$15 green sticker designed to fit on cap not shown!

10mm bolt on lower right side of the reservoir
LeatherZ coolant drain plug with temp sender for real water temp gauge

Oxygen sensor needs to be trimmed about 1/4" to allow the block drain with sender to fit.

Crack in the giubo, although out of focus, is there.